Game Master
Random guides to do random things, written by random game masters for the benefits of the general public.
TsjipTsjip's guide to toolshed
This page displays how to make and use toolshed commands.
NOTE: A lot of this is a skill you build up over time as you gain experience with the commands. Testing is a must, all of the time, no matter what. If you're unsure what a command does, don't run it in live context.
What in the world is a toolshed and why are all the walls ghostroles?
Toolshed commands are, as the name implies, tools. You can put them together to make something amazing. You can also put them together to remove the concept of light from existence. With great power comes great responsibility. A couple of examples:
-
> self nearby 10 with Bloodstream not named "Serendipity Bluewing" do "osay $ID Speak \"Hello.\""This command makes every creature within 10 tiles of you with a bloodstream say hello, but not if that creature is named Serendipity Bluewing.
-
> entities prototyped MobSlimePerson select 1 comp:ensure ReplacementAccent do "vvwrite /entity/$ID/ReplacementAccent/Accent slimes"Makes 1 random slimeperson on the map unable to speak clearly. Blyump!
-
> entities with PointLight comp:rm PointLightThere is only darkness. The world ends! (Until someone dispenses a light from a vendor/constructs a light cause commands only work on current entities, not future ones.
-
> stations:get jobs:job Captain jobs:adjust 4This too is a toolshed command! This one first gets the station, then gets its Captain job, and increases the amount of open job slots with 4.
-
> self not prototyped AdminObserver do "aghost"Ensures you become an aghost. Because the aghost command is a toggle, it's wise to put such a guard in especially if you're using it in a script. We've all ran around accidentally at Mach 300 on CentComm as our commander character before.
This is just a collection of a couple of commands I could come up with on a saturday morning. Toolshed is versatile. Incredibly so.
NOTE: All commands start with a >, this is
necessary to manually type out if you do not have +HOST permissions on the server, as you run these commands
in the context of the server, not your client.
Building blocks
Toolshed commands are built up out of multiple building blocks to tell it what to do. You can imagine a command being a pipeline which feeds things from the left to the right.
Selectors
These are your start commands. You always need to do your toolshed magic on something. This is how you define that something.
-
entities: Selects all entities. Be careful with this. -
self: Selects yourself. No arguments. -
ent ID: Selects an entity with an ID, with the ID being the argument. -
nearby RADIUS: Selects all entities within RADIUS tiles of the input piped entity. Only works for one input entity. Also never selects the input entity itself. BE CAREFUL WITH THE RADIUS. In most cases anentitiesinvocation is better if your radius needs to be bigger than 50 tiles. - Composed:
self nearby RADIUS: Returns all entities within RADIUS tiles of your entity, without selecting your entity itself. -
select COUNT: Picks COUNT entities from the input randomly. Can also take a percentage. -
stations:get: Gets the station entity. That's all it does. Careful modifying this. Usually chained with job slot modifiers. -
player:list: Gets all player sessions. These are not entities and can't be used with most modifiers. -
player:imm NAME: Gets a player session by player name. - Probably more that I haven't listed here.
Filters
So you just selected all entities. But you only want to make all donuts a ghostrole. Not every single entity in the game. Well now you can! Filters are the way to be more specific with what you want to work on. They:
- Take an input piped argument which represents a set of entities.
- Make some kind of check on them.
- Output a set of piped arguments which passed that check.
Interestingly, it's also possible to put not in front of
these expressions to invert the result.
Here's a list of the most common ones:
-
with COMPONENTNAME: The one you'll be using most often. This will narrow down your selection to only those entities that have a component. -
prototyped PROTOTYPEID: Narrows down your selection to just those entities that belong to a given prototype. -
named NAMEREGEX: Go to regexr to figure out fully how this one works. Will match entity names to the regex, and if it matches, will include it in the output. Note that begin and end boundaries for the expression are always added by the game for you. -
actor:controlled: Only entities currently being controlled by a player. Includes aghosts! -
where BOOLCONDITION: This guy is a complex one which you're unlikely to need. Essentially there's conditional expressions that return true or false which work here. An example:> player:list where pref:has "ConsentBeKillTarget" -
rep TIMES: Repeats the input TIMES times. Example:> self rep 10 spawn:on MobAngryBeewould spawn 10 bees. - Probably more that I haven't listed here.
Actions
Now here's the fun bit! You've selected your entities! Now let's turn
all of them into armed nuclear explosives do something with them! This section is very
incomplete. There's a lot of these. You'll figure them out. You can chain most of these
together!
-
visualize: BY FAR THE MOST USEFUL ACTION. This will take the input, and list it on your screen with TP and VV buttons for each input entity. Very useful to incrementally build up your selector and verify that it's working as expected. -
comp:OP COMPONENTNAME: Performs a component operation defined by OP, on the specific component.-
comp:ensure: Ensures that an entity has a given component. Doesn't do anything if it already had it. -
comp:rm: Removes a component from an entity if it has one. Doesn't do anything if it didn't.
-
-
replace PROTOTYPEID: Will entirely replace every input entity with a new instance of the given prototype ID. Output will be updated to match the newly created entities. -
do COMMAND: This is the big one. A lot of commands do not have a toolshed implementation, so they can't be used in toolshed right? WRONG! Any command can be made intpu a toolshed command with this action. A couple of notes:- Always enclose your command in quotes (
"). If the command itself needs quotes, escape them in the command (\"). Example:> entities named "Neptune" do "rename $ID \"Planet Mercury\"" - If you use
$IDin your command, that will be replaced by the entity ID for each entity in the input. - Commands like
setmindcannot be used as these require player names, not entity ID's.
- Always enclose your command in quotes (
-
spawn:OP PROTOTYPEID: Spawns the prototype ID in a way defined by OP.-
spawn:on: Spawns it on the input entity's current location, without any parent. -
spawn:attached: Spawns it attached to the input entity, with offset 0 0. Like a locker essentially, only it won't hide things.
-
-
delete: Cannot be chained off of. Deletes input entities. -
tag:OP TAGNAME: Interact with the tags system. Notably:DoorBumpOpenerwill allow an entity to interact with doors by touching them, even if they don't have hands.
Advanced example: THE BEES WILL CONTINUE UNTIL MORALE IMPROVES
This example was contributed by Milon, game admin at Delta-V.
> self rep 10 spawn:on "MobAngryBee" nearby 10 prototyped MobAngryBee select 1 tag:add "DoorBumpOpener" do "makeghostrole $ID \"Queen Bee\" \"Lead the bees!\"" do "rename $ID \"Queen Bee\"" nearby 10 protoyped MobAngryBee not with GhostRole do "makeghostrole $ID \"Angry Bee\" \"You are an angry bee and you want some pizza.\""
This command can be split into multiple parts for easier understanding
We start off by getting our current character with > self
Then for that character we execute the command spawn:on 10 times
rep 10 spawn:on "MobAngryBee"
The rep 10 part repeats the command ten times, and the
spawn:on command will spawn a provided prototype MobAngryBee on the provided
entity - here that's self
Then we want to fetch everything in a ten tile radius and filter off the bees
we spawned with nearby 10 prototyped MobAngryBee
Once we have all of our bees, we select one of them using
select 1 and add the tag DoorBumpOpener using the command tag:add
Next, for the same one bee, we execute the legacy command
makeghostrole - the first argument is the ID, the second one is the name, the third one is the
description. It's important to use the \ symbol before the quotation mark
Finally, we rename our bee to "Queen Bee"
Then we fetch all nine other bees and also turn them into ghost roles, just like we did with the Queen Bee
Now, a way more efficent way to do this would to have two separate commands, one for the Queen Bee and one for the Angry Bees. This is just a demo of how complex toolshed can get.
The Making of Explorable Maps
Have YOU ever wanted to make a quirky map for others to
explore?
Have YOU ever wanted to take salvage to a possibly new level?
Have YOU ever
wanted to take the crew on an adventure somewhere outside of the station?
Look no further, for i am here to show you the ways of making semi-random spaces for players to explore:
This consists of 1 map and a whole lot of dungen commands (alternatively, you can also use planet to make it a planet map)
We need a fresh map to start our evil schemes, simply add one with
addmap [MapID]
Make sure to remember it's ID, otherwise moving between your map and the
main station can be annoying
Next, we want to teleport to the map using tp 0 0 [MapID]
We're on our super cool map now. It's time to proceed with our hopefully
planned shenanigans.
(You can set a range restriciton to the map so the players can't stray far away from
the objective. To do this, you will need the map's NetID. To view it, press F3 and look for the mention of
Map=[MapID]. Directly under that is it's NetEntity=[NetID] which may or
may not be pretty long. Then, you will want to enter vv [NetID] in your console to open up
the view variables menu. Add RestrictedRangeComponent to the server components and adjust it's data
accordingly. This does not seem to work on non-planet maps though.)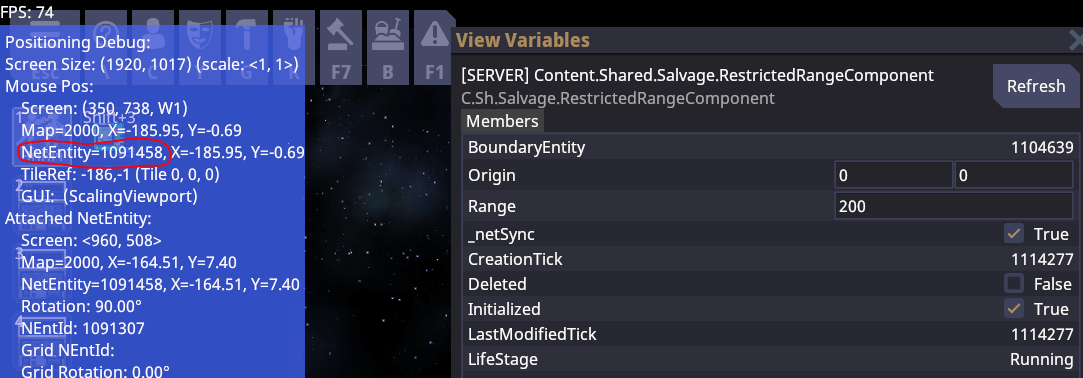
Now, it's time to add structures to our playing field. This ranges from space debree to asteroids and even salvage dungeons. The dungen command will show you autocomplete options which you can choose from. Note that all of those will be randomly generated
This way you can easily make a feeling of a natural looking space, giving both you and the players that sweet satisfaction of immersion.
You can also add fauna to this automatically. Use
biome_addmarkerlayer [BiomeID] to give your space either creatures or ores.
I believe the
map should start with some biomes already set, but if you need to make an additional one, use
biome_addlayer. Note to not make many of these.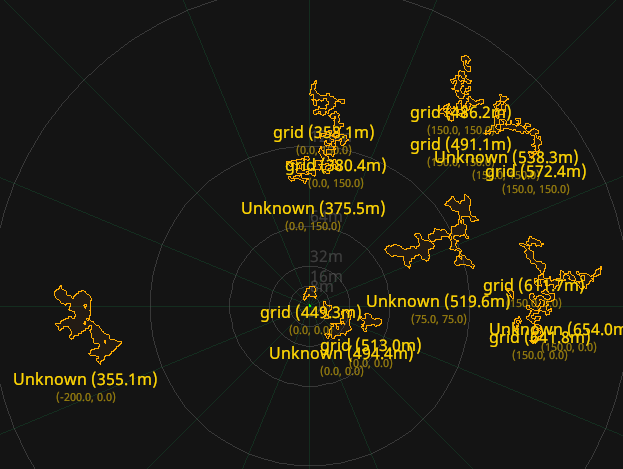
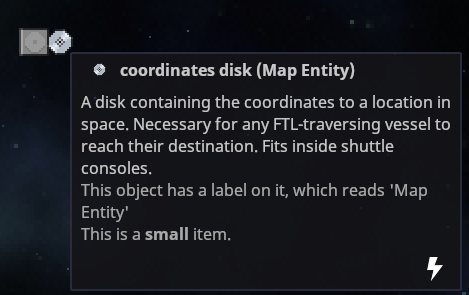
The last and most important part of this is letting the crew actually visit this place. You can either do it in the lazy way and "roleplay" FTLing here with people, or you can give them an actual coordinates disk so they are able to enter and leave this place whenever they wish.
For this, use the ftldisk [NetID] command, which will give
you a diskcase with a coordinates disk which goes into shuttle consoles. This will use the name of [NetID],
meaning you can change the name through vv and make that be the disk's label. You can also
change it manually i believe.
! The name of the map will also
show up on the shuttle console's FTL list, so be sure to change it !